Do you want to install a new roof or replace the existing ceiling at your home? Is your roof prone to frequent damage? If so, it can clearly indicate the absence of the drip edge over your roof. As you know, a roof is an integral part of your home that protects it from external factors such as water, wind, and sunlight. Therefore, keeping it in good shape is essential for your safety. In this manual, you will find your answer to the question- What is a drip edge on a roof? Furthermore, get the necessary details about the benefits of installing a drip edge on your roof and the other information you are looking for. Keep reading.
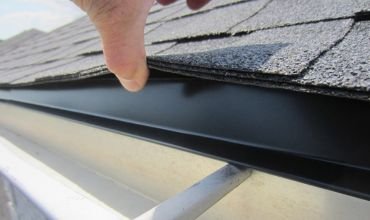
A drip edge is a type of metal flashing placed along the roof’s perimeter, designed to prevent water from entering behind the gutter and beneath the roofing material. Without a drip edge, water may accumulate in the gutters, damaging the fascia board and roof deck. Additionally, these components can protect your home from pests.
Drip edge is generally constructed from copper, galvanized steel, or aluminum and is available in various shapes and sizes to accommodate multiple roofing designs.
A drip edge on roof provides various benefits to your home. Below are some primary reasons one must consider installing a drip edge.
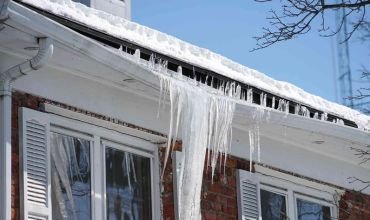
A roof drip edge can deteriorate as time passes. The signs outlined below will guide you in assessing whether your drip-flashing is damaged and necessitates repair or installation.
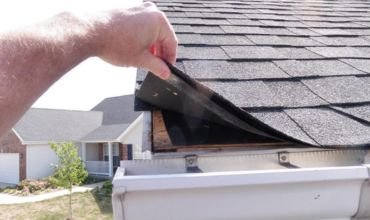
If you want to install a drip edge on the roof, you must contact a professional roofer with the required knowledge and skill set to perform the procedure. Here are the steps related to the installation.
First, you will be required to prepare your roof by cleaning it properly to ensure a smooth surface before the installation. Therefore, make sure to finish the step before beginning the procedure.

Once you finish step 1, it is time to take some measurements. Evaluate the length of the roof edges designated for installing the drip edge. Then, employ metal shears to trim the drip edge flashing to the necessary lengths.
The roofer will then secure the drip edge to the roof deck with roofing nails, installing the fasteners at a minimum distance of several inches from the roof’s edge to prevent water from flowing back beneath the drip edge.
In installing additional sections of the drip edge, overlapping each part by about 2 inches is essential to ensure adequate water drainage.
Finish the roofing installation by installing shingles or various roofing materials over the drip edge and beneath the underlayment.
Yes. A Roof drip edge installation on the existing roof is very much possible but requires much effort. Here is how you can install a drip edge over the existing roof.
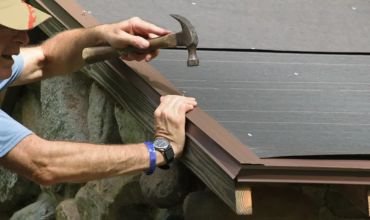
1- The process begins with the removal of starter shingles, conventional shingles, and underlayment to enable the installation of the drip edge over the existing roof. There will be a proper assessment of the decking, with the water-damaged board being replaced before any further work is undertaken.
2- Following the placement of the drip edge, the underlayment will be reapplied over it at the eaves and positioned underneath it at the rakes. It will then be secured with nails that penetrate through the metal into the decking, followed by the reinstallation of the shingles.
3- The above method will be followed at each section of your roof where the drip edge was not previously installed. Ensure that the installation is done with proper care.
The term drip edge denotes a metal flashing that is affixed to the edges of a roof. This component is crucial in preventing water from penetrating behind the gutters.
Drip edges must be installed along the roof’s eaves, where the roof intersects with the wall, and along the rakes, which are the vertical edges of the roof structure.
Assessing the need for drip edge replacement is crucial. Over time, these elements may become damaged, bent, or corroded, lessening their capacity to protect your home from water damage.
Installing a drip edge on a metal roof involves a few variations, yet the fundamental principles continue to apply.
Typically, the installation of drip edges in conjunction with a new roof can incur costs ranging from $1.50 to $3 per linear foot. For existing roofs, it can cost around $5- $9.
A roof drip edge may last 20-30 years if maintained properly. Ensure to use materials that are not prone to rusting.
A drip edge may be installed at any point, even following the installation of shingles. Nevertheless, the most frequent practice is to install it during the shingle installation process.
All roofs should indeed feature a drip edge. Roofing experts widely endorse this component, and it is a compulsory aspect of construction codes in numerous locations.
Leave a Reply