
Are you living in a camper and haven’t done the maintenance for an extended period of time? Then, you are surfing to the correct page. Generally, campers is fun for travelling, living, and making it a comfort zone, but maintaining it can become a task sometimes. However, like any vehicle, campers require maintenance to keep them in good working order. One of the most common and critical maintenance areas is the camper roof. Whether your camper is a pop-up, travel trailer, or motorhome, the roof is constantly exposed to the elements, and over time, it can suffer wear and tear, leading to leaks and damage. So, people have a ubiquitous question: How to Repair a Camper Roof?
In this comprehensive blog, we will walk you through the steps of repairing a camper roof, helping you prevent leaks, water damage, and costly repairs. Whether you are wondering how to repair a pop up camper roof or how to repair rubber roof on a camper, we have got you covered. We will wrap everything from identifying the problem to completing the repair, including the necessary materials and tools.
Before diving into the repair process, it is crucial to comprehend why the camper roof is vital to the vehicle’s integrity. A camper’s roof shields you from rain, snow, and harsh sun while helping to maintain the vehicle’s structural integrity. Leaks or damage to the roof can lead to serious issues, including:
| Issues | Explaination |
| Water Damage | Leaks can result in mold, mildew, and rot, which can cause extensive damage to the camper’s interior. |
| Energy Efficiency | A damaged roof can lead to increased energy consumption, affecting insulation and causing heat loss during cold months or heat buildup in hot weather. |
| Structural Damage | A compromised roof can weaken the entire structure of the camper over time. |
| Expensive Repair | The longer you wait to address roof issues, the more extensive and costly the repairs may become. |
To prevent such problems, regular maintenance and inspection is a key. If you detect any damage, addressing it fast can save you time, money, and stress in the long run.
It is crucial to determine the type of damage your roof has sustained before you begin any repairs. Some common camper roof issues include:
| Problems | Justification |
| Leak | One of the most common problems with camper roofs is water leakage. Leaks can develop due to poor seals, aging material, and damage from debris such as branches or hail. |
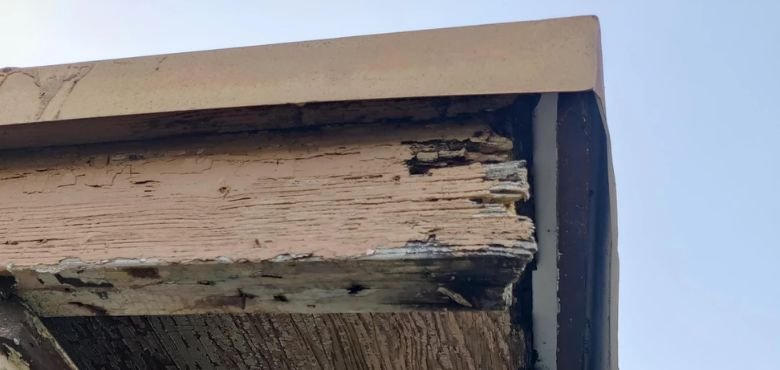
| Cracks and Tears | Over time, the roof material can crack or tear, especially when exposed to extreme weather conditions. UV rays, temperature fluctuations, and physical damage can weaken the roof. |
| Loose or Failed Seals | The seals around vents, skylights, and other roof features can deteriorate over time, allowing water to seep into the interior, leading to leaks and water damage. |
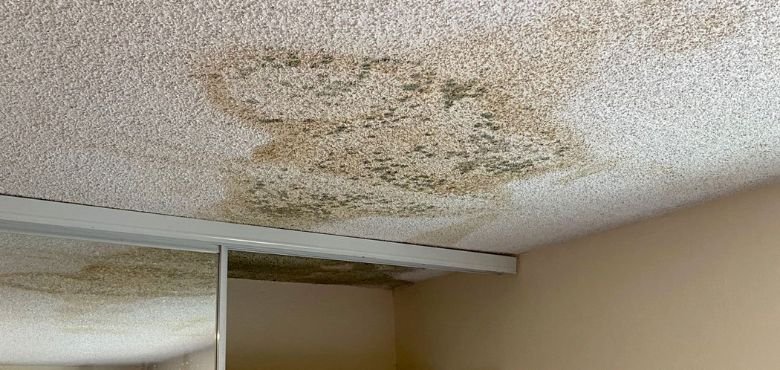
| Mold and Mildew | Excessive moisture inside the camper can lead to the growth of mold and mildew. If the roof has been exposed to water, this can quickly become a serious issue, creating unpleasant odors and potential health risks. |
| Blistering or Bubbling | Over time, the roofing material can blister or bubble, especially if there is a buildup of moisture or air underneath the surface. These areas are vulnerable to damage and leaks. |
| Sagging Roof | A sagging roof could indicate a structural issue, such as damage to the roof supports or an accumulation of moisture. This requires more extensive repairs and may involve reinforcing the roof structure. |
Primarily, gathering the right materials and tools is essential before starting the repair of the compare roof. It depends on the type of damage you may need different materials, but here are some basic essentials:
| Needs | Justification |
Material | Textiles Rationale Roof Sealant A high-quality RV roof sealant, such as rubber, silicone, or polyurethane, for sealing cracks, seams, and around roof features like vents. Roofing Tape It is for temporarily sealing small cracks and joints. Roofing Membrane If your roof is damaged, you may need to apply a new roofing membrane, such as rubber, EPDM, or TPO. Fiberglass Cloth For reinforcing cracks or holes with a durable material. Roofing Primer Prepare the surface for applying new roof sealant or membrane. Caulk For sealing minor cracks and gaps around seams, vents, or edges. Roof Repair Kits Many RVs come with specialized roof repair kits for quick fixes. |
Tools | Mechanisms Explaination Ladder A sturdy ladder to access the roof safely. Putty Knife or Scraper To scrape away old sealant or debris. Cleaning Supplies Mild soap, water, a soft brush, and rags for cleaning the roof before repairs. Utility Knife For cutting roofing materials or tape. GlovesTo protect your hands from sharp edges and chemicals. Screwdriver or Drill For removing or securing roof components, like vents or skylights. |
Optional | Object Justification Pressure Washer For thoroughly cleaning the roof surface before repairs, use caution to avoid applying too much pressure, which could damage the roof. |
Here are some of the steps mentioned below to understand how to repair camper roof:

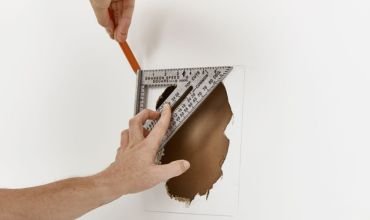
To begin repairing a camper roof, start by conducting a thorough inspection of the roof. Check for signs of cracks, water damage, loose seals, and tears. Use a ladder carefully to access the roof, examining all areas, including vents, skylights, seams, and corners. Look for:
Pay close attention to specific areas that need repair, and prioritize repairs based on the severity of the damage.
Before proceeding with any repairs, thoroughly clean the roof. This step removes old sealant, dirt, and debris, ensuring that new materials adhere properly. Use mild soap and water, along with a soft brush, to gently scrub the roof. For tougher grime, use a non-abrasive cleaner specifically designed for RV roofs. After scrubbing, allow the roof to dry completely before moving on to the next step.
For small cracks or holes, use a roof sealant or repair tape. Begin by applying a generous amount of sealant to the affected area, smoothing it out, and covering the entire crack. For larger holes, reinforce with fiberglass cloth or roofing tape.
Allow the sealant to dry thoroughly before proceeding.
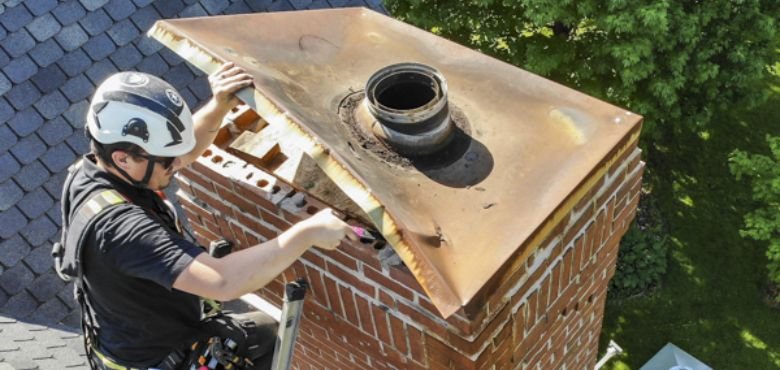
The seams where the roof meets the camper’s walls, as well as around vents and other features, are common areas for leaks. Apply a high-quality RV sealant to these seams to create a waterproof barrier. Use a caulk gun to apply the sealant, ensuring that you cover all gaps and cracks. Add a layer of roofing tape along the seams and edges for added protection.
You may need to replace your roof membrane if it is extensively damaged or worn. Carefully remove the old membrane by cutting along the edges and peeling it off. Make sure that the surface below is comprehensively cleaned.
Next, apply a new membrane suitable for your camper type, such as EPDM, TPO, or rubber roofing material. Cut the new membrane to size and lay it over the roof, smoothing it as you go. Seal the edges with high-quality RV sealant, ensuring the membrane adheres completely.

After making the necessary repairs, you must continue to inspect the roof regularly. Look for signs of wear and tear, especially after significant weather events have occurred. Apply new sealant as needed and keep the roof clean to prevent future issues.
If you detect significant sagging or structural damage, or if your camper roof requires comprehensive repairs, it may be time to consult a specialist. While DIYers can typically handle minor repairs, larger issues could compromise the safety and integrity of your camper. Experienced professionals at Manage My Roof will have the necessary tools and expertise to handle these repairs.
Repairing your camper roof may seem daunting, but with the right tools, materials, and a bit of patience, you can address the most common issues yourself. Regular maintenance and timely repairs will extend the lifespan of your camper, ensuring that your trips remain comfortable and safe. Still looking for more assistance regarding how to repair Camper Roof? Connect with us freely!
If you want to repair the leakage in the camper roof, clean the area, apply a suitable sealant or roof repair tape over cracks or holes, and allow it to cure. Later, test the leakage after the roof has been repaired.
Look for signs such as leaks, visible cracks, soft or spongy areas, bubbling or peeling seals, and water stains inside the camper.
First, clean the area around the hole. Then, apply a roofing sealant or adhesive and place a roof patch over the hole. Ensure that you seal the edges carefully to prevent any leaks.
If there is extensive damage, you may need to cut out the affected section, remove the old roofing material, and replace it with new material, such as rubber or fiberglass.
To help prevent future damage, conduct regular inspections, clean the roof, and reseal it every few years. Additionally, try to park the camper in a shaded area and avoid exposure to heavy debris.
Make sure the roof is clear of debris and ice. A tarp or an RV roof cover can help protect it from snow and ice buildup during winter.


Leave a Reply