The stiff winds and stormy rains do not occur in time. Indeed, all-natural disasters can occur at any moment, leaving many roofs to leak and damage. Hence, to stay safe, mandatory precautions must be taken to repair the roofs, even on a temporary basis. So, if you are also in such a situation that your roof is damaged and you are thinking about what to do next, Then, worry not. ManageMyRoof has got you an answer. Our professional roofing experts claim that tarps or tarpaulins are an effective temporary solution for the damage caused. Now, you must be wondering how to tarp a roof. Isn’t it so? If yes, then read on to find your compiled answer to this question. It goes as:
Know How to put a tarp on a roof?
Tarping is one of the most reliable temporary solutions for roof leak protection. It has proven to be a durable transient roof cover until the damage is repaired. The process of putting a tarp in is quite simple, and our team knows how to tarp a leaking roof effectively. Here, you can learn how our team works to put on a cover for an emergency roof repair in 3 quick steps. This includes:
1. Roof Damage Analysis
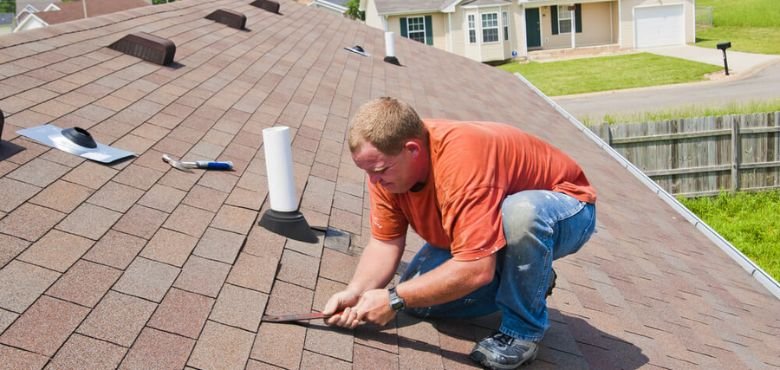
First of all, our technicians assess the existing damage caused to the roof for a reliable resolution. This process comprises four steps, and they are:
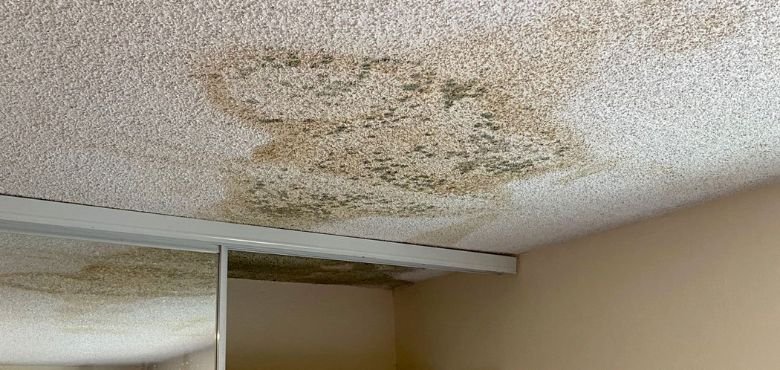
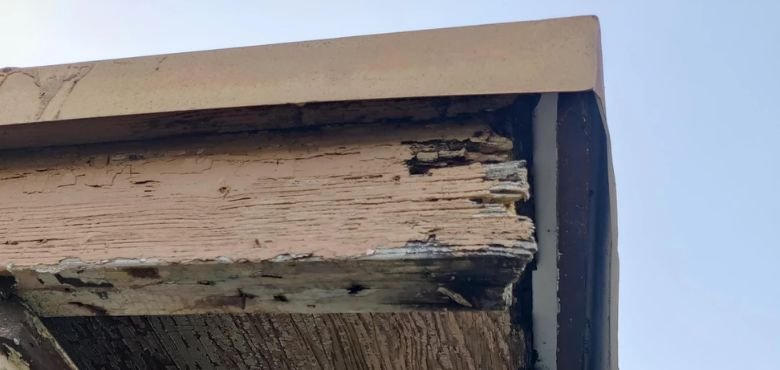
- Find out the damage points on the roof: The team would start by taking cautious rounds on the roof and looking for all the damage points. They would look carefully for scattered debris and broken roof tiles. Note that there can be more than a single section with tile tears. Meanwhile, they would look for the attic as well and examine the ceiling since the more prominent water stains on the roof woods are signs of severe roof devastation.
- Measurement of damage points: The next thing is to get the measurement for the roof damage points carefully. In fact, this is one of the essential aspects, and you should make a precise note of the dimensions. However, the roofing experts even captured images of the holes for later analysis.
- Suggesting the right tarp: Once the complete analysis is done, the technicians will recommend a suitable tarp based on the size and damage issues. However, it is best to get a giant tarp rather than a smaller one because most of them might cover the roof but not offer the proper protection over the destroyed areas.
2. Unwarping a Tarpaulin and Laying it
After this process, our trained team starts working on laying the tarp once the damage points are recognized. This procedure would involve the following steps:
- Cleaning the debris and waste: Before tarping a roof, it is vital to clean it of all debris and waste materials. You must ensure that there are no branches, leaves, or other waste. If so, brush everything off to make it convenient to lay the cover and avoid any hassle.
- Tarp Corner Unwrapping: Tarps are very wide and can be challenging to handle, especially on windy days. So, the technicians unwrap the tarp right away from the packaging to gain a firm grip on it.
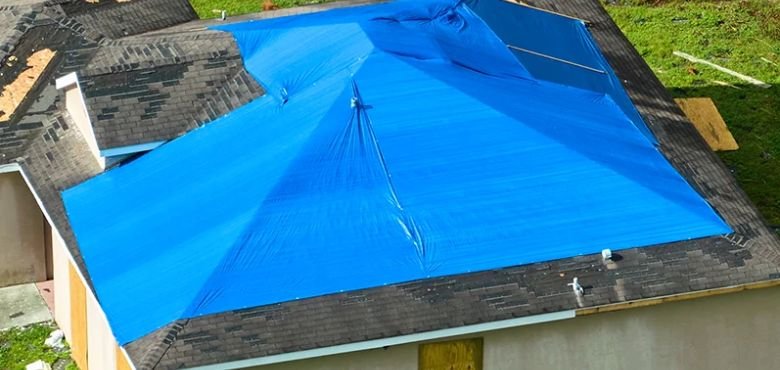
- Laying the Tarp over the Roof: The team lays down the tarp across the roof to cover about 4 feet or 1.2 meters on both sides of a sloped part of the roof. However, the leftover tarp hangs off the lower border of the roof to overhang the wall.
3. Safely Securing the Tarp to Roof Sections
Our last and final step in tarping a roof is securing the roof sections properly, and this includes:
- Drilling the Ends: Make a note that the four vertices are the peak ends, and the technicians lay a 2×4 board under one of these ends. They ensure that at least 2 feet or 0.61 meters of the tarp stick out to the edge. Further, you should stick the tarp and board using a hammer to clip the nail into the board underneath. This process is repeated for more than thrice.
- Wrapping Tarp around the boards: The next is to wrap the tarp around the boards and warp it around the board below to cover all the sides. Then, they lift the boards from below and move it clockwise. As soon as the tarp has covered all sides, it is laid on the roof again, repeating the process for every wooden board.
- Screw the tarp and boards: To secure a tarp cover and the board within the roof, the technician uses drilling. They choose six equal-spaced spots on every 2×4 board and drill it with a screw 2 inches or 5.1 cm long screw. Hence, this fixes the board and the roof to ensure that there is safety in harsh weather.
- Screw four perpendicular boards: Subsequently, the trained experts lay the board on the roof and placed it against the longer side of the screwed boards. This new board must be at 90-degree angles to the previous board and screw six equally spaced spots on the board with a drill.
- Fix the Tarp with 2×4 boards: Lastly, they attach double 2×4 or 38 x 89mm boards under the overhanging tarping to stabilize it. Then, the peak is secured, and the cover is expanded onto the roof for a solid surface. 2×4 boards that are 2 feet or 0.61 meters are attached with cap nails. The roofing professionals add an extra anchor board as needed and plan a permanent roof repair.
Final Verdict
So, by now, you must have got your answer to how to attach a tarp to a roof with detailed information. Even if you are pretty unsure about it, there is nothing to get worried about at all. We at ManageMyRoof work dedicatedly to ensure that you are safe and secure. Regardless of whether a devastating storm is on its way or it’s raining heavily, we are at your back to support you. Our team of trained technicians offers reliable damage repair services. These offerings include thorough inspections, damage analysis reviews, and quick repair scheduling. Thus, stop getting worried and reach out to us right away!
Commonly Asked Questions
Name the best way of temporary roof cover? You can use tarpaulins to get temporary roof cover as they are highly durable and offer leak-proof shelter.
How to tarp a damaged roof? To tarp a damaged roof, you should lay down the tarps over the damaged areas and ensure there are no gaps or sagging.
Do tarps offer protection with harsh wether conditions? Yes, they do. You can use the tarps to survive moderate to harsh winds and rains. Yet, it is essential to keep an eye on it and change the tarp when needed.
How to install a tarp on a roof? You can secure a tarp by using a screw gun to fix the tarpaulin rolls. You should use a long screw to screw the tarp, boards, and shingles within the roof decking.
How to tarp a metal roof? To tarp a metal roof, you need to position some of the lumber 1×2 dimension pieces on the tarp in a vertical series. Then, add these prices over the tarp and into the roof decks with eight nails within every 16 inches.
How to tarp a flat roof? You can tarpaulin a flat roof using bungee cords by attaching them to the edges and vertices of the tarp. However, ensure that the tar is properly to avoid wind lifts and potential damages.
How do you secure a tarp to a roof? To secure a tarp on a roof, it is important to fix it with the 2×4 boards using the nails and screws.
How to tarp a roof leak? You can reach out to ManageMyRoof for tarping your leaking roof effectively to avoid further damage.


Leave a Reply